Showing posts with label diy. Show all posts

Wednesday, April 17, 2013

washi swapping


Fox + Hazel
it's no secret that I looove washi tape
{my hubby likes to tease me about it}
so when I saw that Torrie was hosting a swap,
I knew I had to join in. :)
I was paired with the lovely Ashley
from A Fox & A Wolf,
and I just love the tape she sent!

I had to dig in as soon as I got the package,
and I happened to see this cute idea


now my phone cord is much happier,
and I can't wait to put the rest of my new washi to good use.
thank you SO much, Ashley!
& thanks to Torrie for hosting, so fun!

>>>>> <<<<<

don't forget to stop by & enter to win

Monday, February 11, 2013

inspire me // hearts


valentines day is just around the corner,
so i'm sharing some pretty lovey-dovey hearts
that are inspiring me today!
heart gift wrap // wood heart necklace // corner bookmarks
arrow heart tee // washi tape // heart + keys stamp

Monday, November 12, 2012

a wreath for our door


i finally put together a pretty wreath to brighten up our front door...
it's something i've been wanting to do for a while but just had to make the time for it.
several long-ish hours, lots of patience and hot glue,
and there you go!

and my favorite part of this oh-so-pretty wreath?
seeing it hanging there every time i come home.
it just makes me happy. :)

// details //
styrofoam wreath form wrapped in yarn
(all purchased at Michael's w/ coupons)
felt for the flowers from Feltcraftic
tutorials for the flowers found here

Monday, April 30, 2012

washi + doilies = love!

{picked up these rolls at Target last week!}

I'm definitely in love with the washi tape trend,
& I've seen some really adorable packaging & wrapping ideas lately.

love this eclectic mix of tapes + text! {found here}

glassine bags + doilies + washi {found here}

my friend Elizabeth @ Sew Chatty used washi to dress up this baby gift - adorable!

Do you love washi? What is your favorite way to use it?

Happy Monday!

Friday, January 13, 2012

projects on my list.


{1} side panel shirt refashion
{2} chunky circle scarf
{3} washi tape clothespin magnets
{4} diy coasters
{5} lined drawstring bag

What projects are on your list currently?

Monday, September 12, 2011

{diy ideas} washi tape!

I've seen washi tape popping up all over the place lately!
I'm probably the last to know {that's usually me when it comes to trends...},
but I think there are so many cute patterns & designs
And it's so versatile!

So, I just wanted to share some fun projects
I've found that you can do with washi tape.
Like...

these sweet little washi flowers

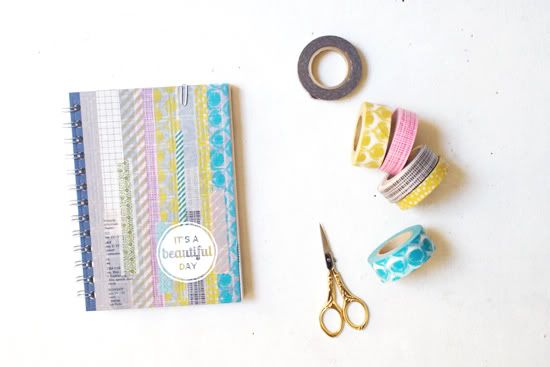
makeover a plain notebook


and a favorite of mine, washi bunting.

I'm pretty certain that I need to get some of this tape SOON so I can start creating!

I've seen cute washi tape here & here...
If you have a washi tape source, do share!

Happy Monday, everyone!

Thursday, September 8, 2011

one month!

One month. Can you believe it?!

Back in January, when we got engaged,
October seemed ages away.
The closer we get, the faster it comes.
And I couldn't be more excited! ;)

So what have I been up to lately?
Obviously, lots of projects for the wedding...
{from top left to bottom right}

{1} I have at least 4 lists going right now.
Things are getting done, and my lists keep shrinking!
{2 & 3} I'm making my own veil, and the DIY Bride magazine
has an easy set of instructions to follow.
(I ordered the netting on Etsy.)
{4} This is one of my favorite projects,
these sweet little birdhouses. :)
{5 & 6} I looove this fabric.
When you see pictures of our wedding,
that fabric will be in lots of places. :)
Including 24+ yards of pennant bunting!

So, there's a little sneak peek at a few of the details.
I can't wait to see it all put together!

P.S. We also found a place to live!
Papers are signed, and we get the keys on Monday!!
I'll be sharing more about our new home soon...

Wednesday, June 8, 2011

What I Love Wednesday {the DIY edition}

As I'm sure you've all figured out, I just love to create new things.
Here are a few ideas that are on my list...


these pretty t-shirt flowers from matsutake


this fantastic garland idea - I think I'll make some for the wedding!
{I can't find the original source...if you know, please share!}

See my things to make and do pinboard for more inspiration!

linking up at Lollipops

Thursday, April 21, 2011

{diy} embellished gift bag

I love packaging up gifts for the people I love, for sure.
Often people can tell who the gift is from because of my wrapping "style"...

Anyway, it was a dear friend's birthday a couple of weeks ago,
and I did something a little different for her gift that I wanted to share.


what you'll need:

a plain {boring} gift bag
coordinating paper of some sort.
a hot glue gun
scissors

In my case, I picked up a plain bag at Target and some wrapping paper that matched. I knew I wanted to try something new, like a paper flower.
You might notice that it turned out a lot like the blooms in my shop... ;)


All you have to do is cut out a bunch of circles from the paper.
Fold them into quarters & begin hot gluing them in a circle.
{I traced a circle onto the gift bag as a guide before I started gluing.}
My flower is 3 layers deep, but you can play with it
until you get the look you want.
Cut a smaller circle for the middle of the flower.


And there you go!
I love how it turned out.
So much cuter than a plain bag. :)

Have fun creating!

*****

Thank you so much for your sweet comments yesterday.
My grandpa is doing well, and prayerfully, his recovery will also be smooth.

Also, you could win a sweet pouch made by me! Please stop by & check it out.

Monday, March 14, 2011

{diy} will you be my bridesmaid?


I saw this idea first on the lovely Caroline's blog,
and I knew I wanted to do something special for my bridesmaids.
It was the perfect idea, and they all loved it!

First, I needed a chalkboard.
I bought a wooden plaque at JoAnn's,
some chalkboard paint, and some fun pink paint for the border.

I painted the edges of the plaque first, with the 2 shades of pink I'd chosen, then carefully painted the middle with the chalkboard paint. I ended up doing 3 coats of the chalkboard paint, and the worst part was waiting for it to cure for 24 hours!

{I hated taking these pictures. I felt SO awkward. Seriously.}

I wrote "Will you be my bridesmaid?", and snapped some photos with my sister. Sent them to Target to be printed, and then worked on the frames.


I just got some $1 frames at Michael's and painted them to match.
I loved painting them! It was so fun to do the pink edges & scallops. :)


I found the perfect complementing ribbon, made some adorable little cards {which you'll see on the blog sometime in the future}, and mailed them off!

This was a great {and easy!} project, and you could use it in other ways, too. I plan on using that chalkboard again, for sure! Many thanks to Caroline for sharing the inspiration!

Tuesday, December 21, 2010

{diy} a pennant banner

thanks so much for all the sweet birthday wishes yesterday! {{hugs}} to you all!

*****

Several years ago, my mom got a birthday banner that she puts up for every. single. birthday.
She loves it. Me? Not so much...

I should have snapped a picture of it, but just imagine
pink, purple, yellow and tootsie rolls. Not my style at all!

I decided that a new birthday banner was in order. So I made one myself!


I love these pennant-type banners :: I like the neutrality, with the ability to dress it up if you want to. It was really easy to put together, with just a little time and effort.


I used:

- kraft cardstock paper
{bought at Michael's in a pack of 50 for $3.99, used a coupon}
- letter stencils
{you could buy these, or make your own. i printed the letters
out on plain cardstock and cut them out very carefully to make the stencils.
this was the most time-consuming part!}
- a sharpie or other marker
- ribbon
- hole punch
-small silver brads
{i got these at Michael's a couple of years ago}

Once you've gathered your supplies, you'll need to cut out the pennant shapes.
I made my own template, and it's easy to customize the size you want.
I was able to cut 3 pennants out of one 8.5x11 sheet of cardstock.
If you aren't sure of the size, play around with it.

Next, trace out the letters onto the pennants.
I made 2 banners, "hurray" & "happy birthday".
Once I got the outlines traced, I filled them in with a black sharpie.

I used mini brads, so I ended up punching the holes with my paper piercer.
Then I just attached all of the pennants together.
The brads make it easy to fold up the banner to store it.

Last step!
Punch holes at each end of the banner and string some ribbon through for hanging.


See?
I love it!
And it's so easy to personalize for any occasion.

I used the instructions from Erin's blog for the paper "thing" {I'm not sure what it's called!} - I just added a '20' to the middle for fun!


Happy crafting!

Thursday, December 16, 2010

{sunshine and carousels} - DIY gift toppers!

I just happened upon this lovely post from Erin {sunshine and carousels}, and I just had to share!


See all those gorgeous gifts?
{Wrapping presents is one of my favorite parts of the Christmas season, actually!}

For my gifts, I went for the simple look, "brown paper packages tied up with string".
Erin posted all sorts of lovely topper ideas, and I plan on making at least a few of them.


Be sure to read Erin's post for fabulous ideas & directions - I know you'll love it, too!